
Ruger Mark III Field Stripping Disassembly Procedures
Click thumbnail image to enlarge
| Step #1 | Verify the pistol is unloaded. Open the bolt and inspect the chamber to verify it is empty. |
|
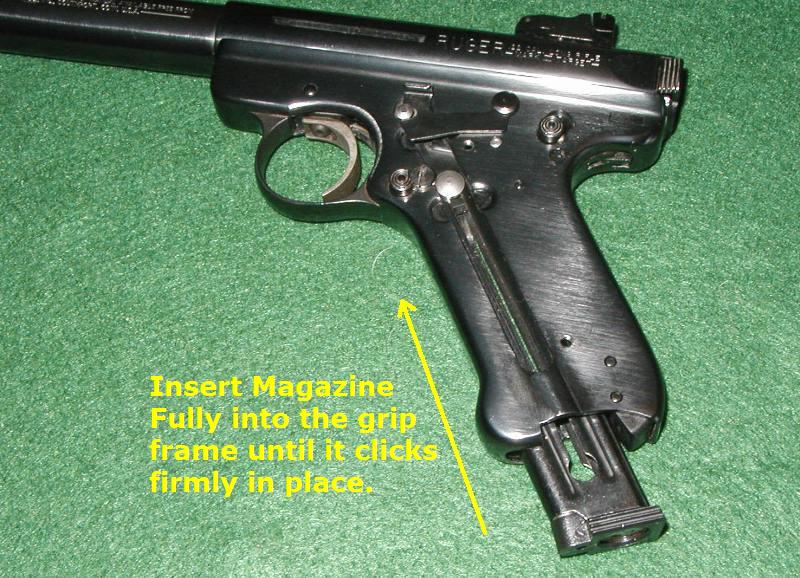
| Step #2 | Insert an empty magazine into the pistol. |
 |
| Step #3 | Squeeze the trigger, listen for the hammer to "click". Note - Hammer must be in the fully up or uncocked position to proceed with the disassembly. Also the pistol's internal locking screw must be turned fully flush with the key to remove Mainspring Housing. (Picture here) |
 |
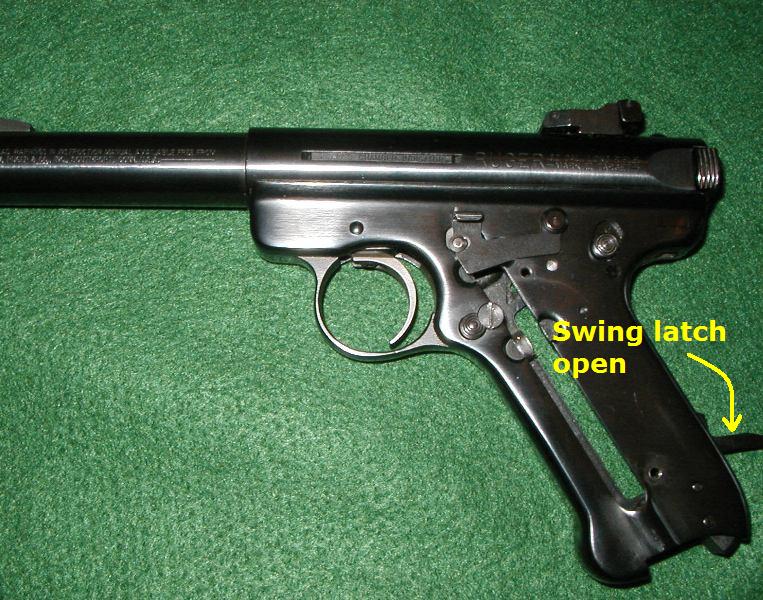
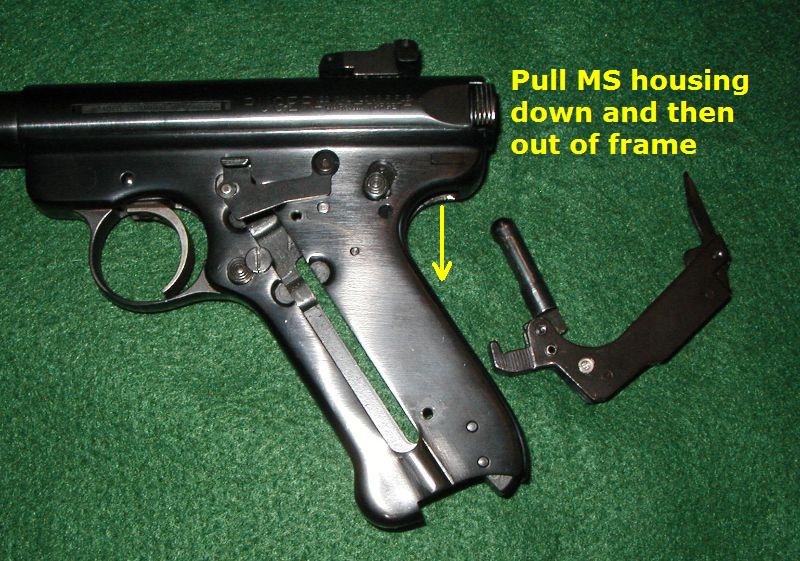
| Step #4 | Open the mainspring latch and then swing the mainspring housing out of the frame well. (22/45 must remove magazine before unlatching mainspring housing) |
 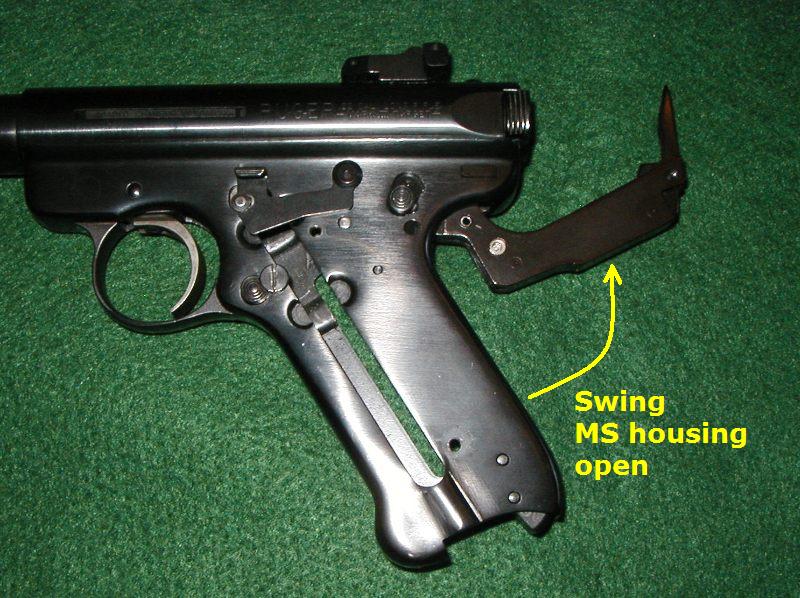 |
| Step #5 | Pull mainspring housing downwards to remove the bolt stop pin from the recevier. Remove the entire mainspring assemby from the frame. |
 |
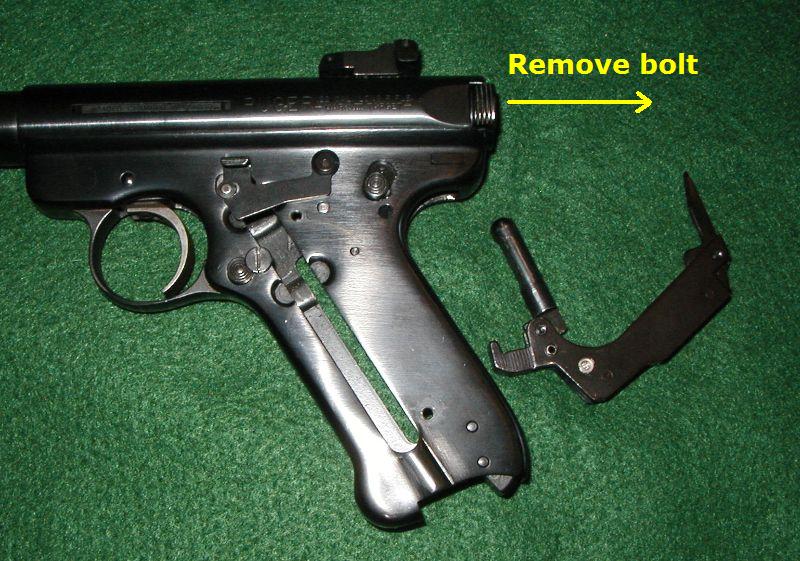
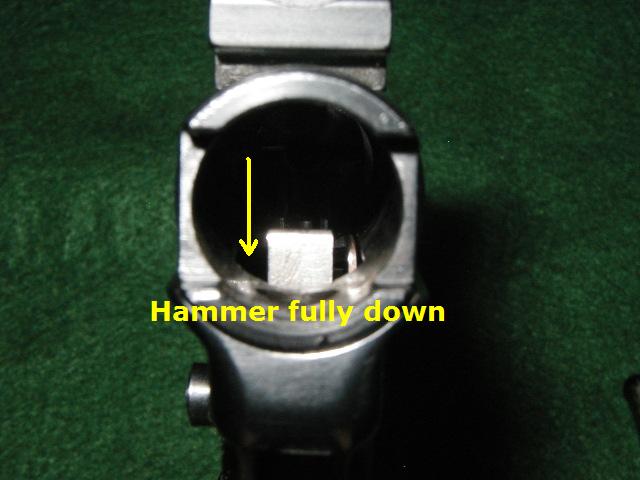
| Step #6 | Pull bolt rearwards until it is clear of the receiver. Note - Hammer will now be in the down or in the "cocked" position. |
 |
| Step #7 | Remove the magazine from the grip frame. Caution - The receiver will not come off of the frame if a magazine is installed. (22/45 skip to step #8) |
|
| Step #8 | Slide pistol's receiver forward until it separates from the grip frame. (tap receiver with a mallet if necessary.) Pistol is now field stripped for cleaning or other maintenance. |
 |
Ruger Mark III Field Stripping Reassembly Procedures
Click thumbnail image to enlarge
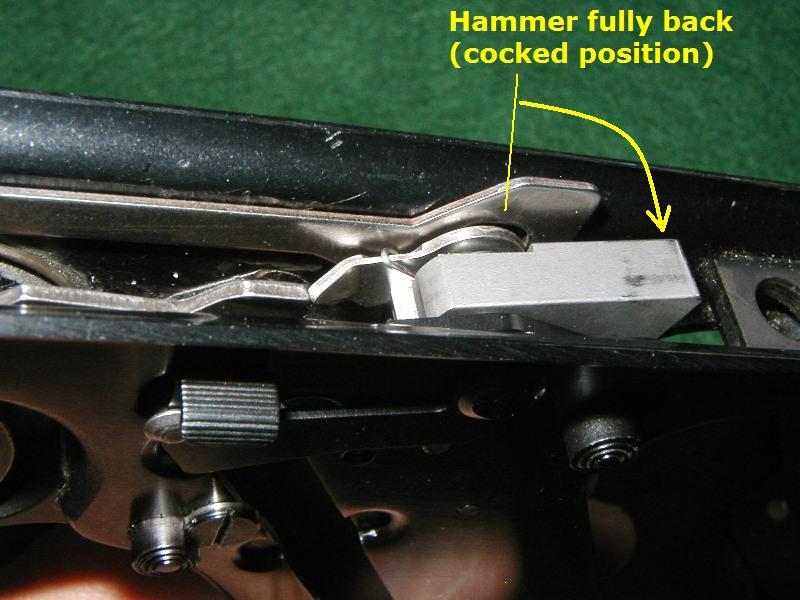
| Step #1 | Ensure hammer is in the fully down or in the "cocked" position. |
 |
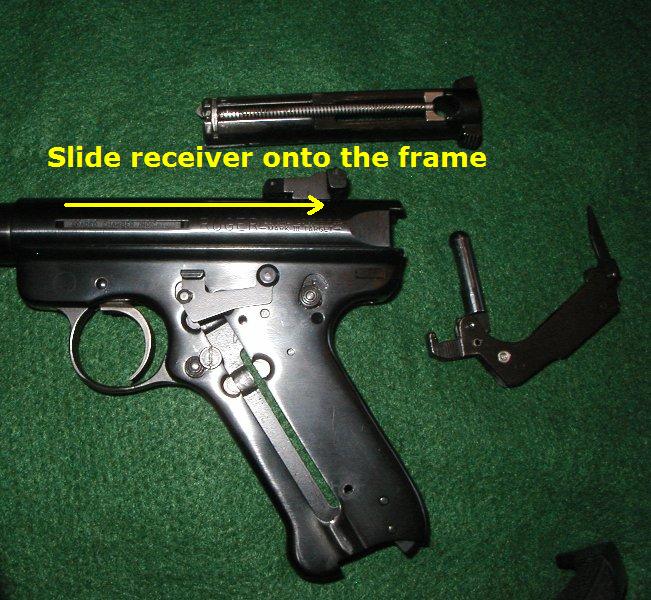
| Step #2 | Slide receiver onto frame. Look to ensure rear bolt stop holes are perfectly aligned. |
 |
| Step #3 | Ensure hammer is fully back (uncocked position), reach in and pull it down if necessary. |
 |
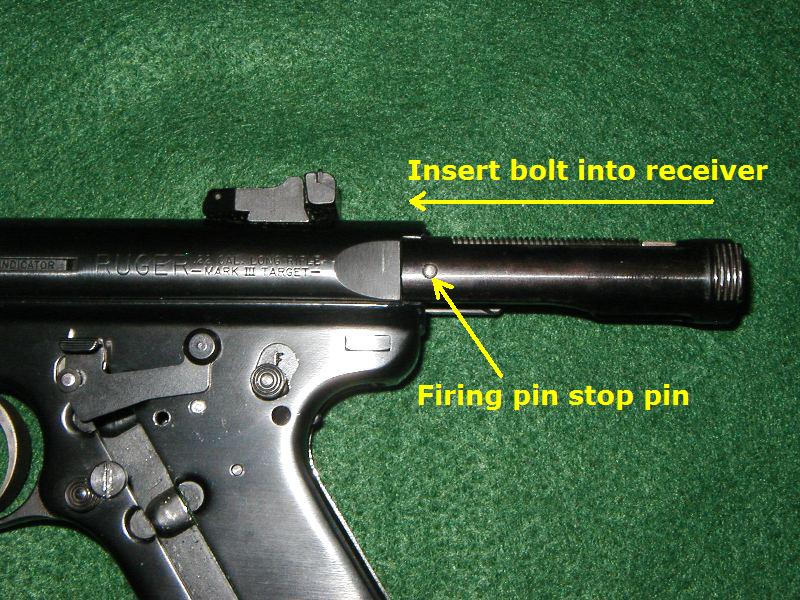
| Step #4 | Insert bolt into receiver. Caution - visually verify firing pin stop pin is installed prior to full bolt insertion. New Mark III with a roll pin firing pin stop (picture here) |
 |
| Step #5 | Flip pistol upside down and insert an empty magazine. |
|
Step #6 |
Squeeze trigger and push hammer fully forwards (uncocked position) with a punch or other long tool. Note - if the hammer is not positioned fully forwards the mainspring housing will not seat properly in step #8. |
|
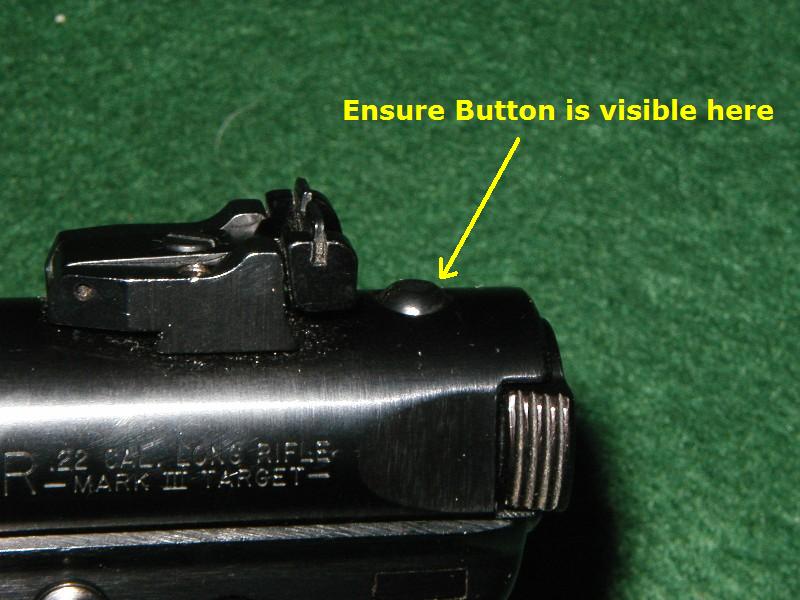
| Step #7 | Insert mainspring housing bolt stop pin until it "clicks" fully in place. Note - you should see rounded part of bolt stop pin above the top of rear receiver hole. |
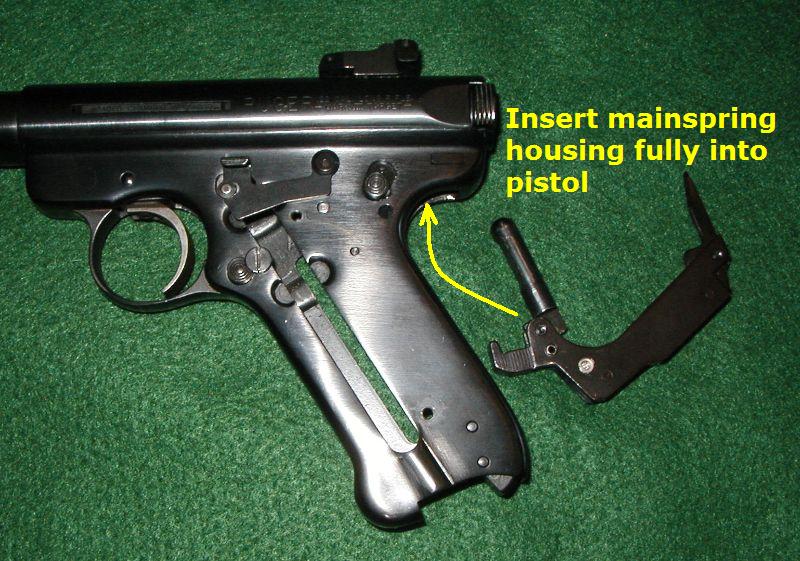  |
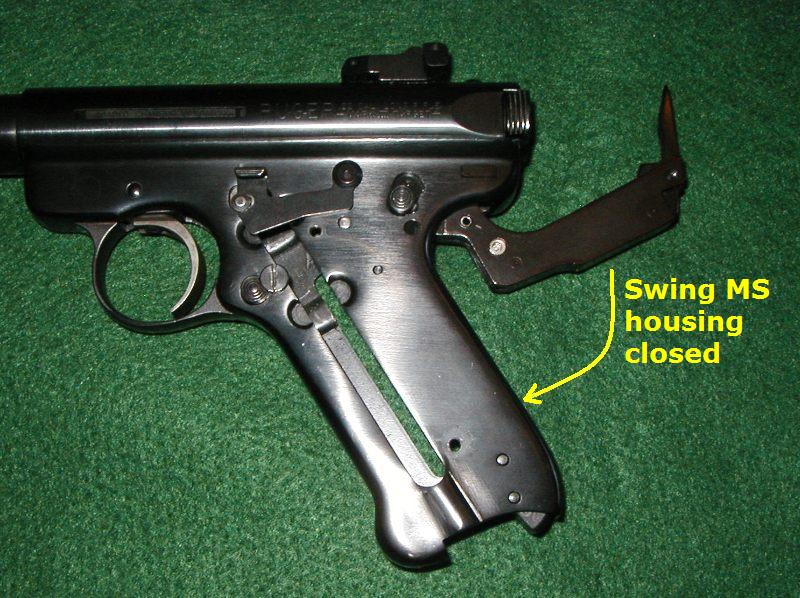
| Step #8 | *Most Critical Step* of reassembly. Swing mainspring housing nearly closed, tilt pistol slightly rearwards so hammer strut falls onto mainspring housing ledge, close housing slowly, ensuring hammer strut stays in place. |
 |
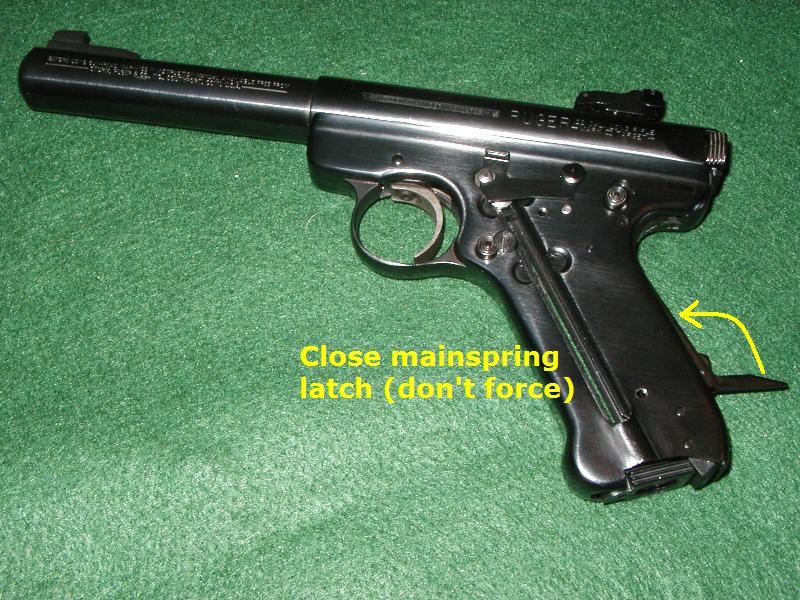
| Step #9 | *Without Force* Close mainspring housing latch. If latch doesn't want to close, reopen latch and perform Step #8 again. (22/45 must remove magazine to close latch fully) |
 |
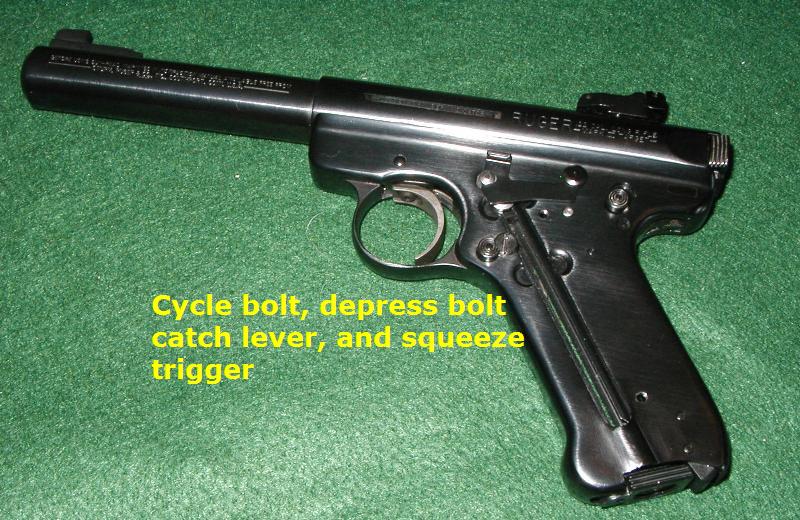
| Step #10 | Open bolt assembly. Bolt should automatically lock open. Pull bolt rearwards and depress bolt catch lever, close bolt. Squeeze trigger, hammer will fall. FINISHED! (22/45 reinsert magazine prior to performing step #10) |
 |
Copyright © 2006 - 2018, Bullseye, All Rights Reserved, Guntalk-Online.com