

Essentially the hammer strikes the bolt every time without damaging it. The firing pin offers little resistance to the hammer so full force is delivered by the hammer to the back side of the bolt face. These parts are both engineered to take the stress.
R,
Bullseye
Tips for dryfire on MKIII?
Moderators: Bullseye, Moderators


-
Georgezilla

- Master contributor

- Posts: 702
- Joined: Tue Apr 24, 2007 4:35 pm
I can only speak for the bolts with the old style firing pin stops, but; for said pistols it's not difficult at all. From the time the pistol is fully assembled I can get all the parts in question out and put the pistol back together in under a minute.Adam67 wrote:How difficult is it to remove the firing pin for a dry firing session?
Heres a link to a detailed strip that Bullseye made: http://www.guntalk-online.com/detailstrip.htm
The bolt disassembly is towards the bottom of the page.


Wall Anchors?
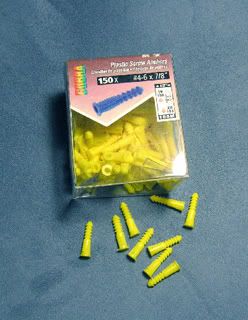
Bullseye,Bullseye wrote:The new roll pins are too new. I haven't seen any empirical data to support or prohibit the practice of dry firing with the new style roll pins. Caution is the way to go when dry firing with the Rugers, don't over do it. If the stop pin deforms the breech face will get dented. This can be fixed but it takes a chamber iron and that's not something everyone has laying around for their rimfires. The best thing to do is use a buffer in the chamber to protect the breech face. The plastic wall anchors are probably the best and most inexpensive tool for this purpose.
R,
Bullseye
Help me understand exactly what type of wall anchor you suggest for this purpose. I need to get some.
THX!

-
melchloboo
- Regular contributor

- Posts: 181
- Joined: Tue Mar 04, 2008 7:31 am
I tried the anchors, but in response to your question I did not like the idea of the firing pin ever striking the same spot on the rim more than once. I found them rather hard to eject, having to manually pry them out sometimes. I like the empty brass instead. But in any case, I think to be safe you should rotate whatever you use each time so the firing pin does not hit the same spot, especially with the plastic, because it will eventually get torn. The pin will eventually just break through if you keep striking the same spot. If you do that, you can probably use each one 10 times. And just in case you did not know, the pin strikes at 12'oclock.
I think the yellow ones fit, and I believe the colors are industry standard at any hardware store.
I think the yellow ones fit, and I believe the colors are industry standard at any hardware store.
-
melchloboo
- Regular contributor
- Posts: 181
- Joined: Tue Mar 04, 2008 7:31 am
Just remember.....the pin should never hit the chamber in these Rugers even without brass or anchors. They do have a "stop pin" in the bolt which when functioning properly will prevent damage to the chamber. Now I will be the first to admit that my particular Mark III stop pin did fail....it's at Ruger right now getting fixed.melchloboo wrote:I tried the anchors, but in response to your question I did not like the idea of the firing pin ever striking the same spot on the rim more than once. I found them rather hard to eject, having to manually pry them out sometimes. I like the empty brass instead. But in any case, I think to be safe you should rotate whatever you use each time so the firing pin does not hit the same spot, especially with the plastic, because it will eventually get torn. The pin will eventually just break through if you keep striking the same spot. If you do that, you can probably use each one 10 times. And just in case you did not know, the pin strikes at 12'oclock.
I think the yellow ones fit, and I believe the colors are industry standard at any hardware store.
I am gonna have to git back with you'ins... I am trying to redneck up a dee'vice half agin tween the empty brass and a plastic anchor...
As for the bad firing pin stop pin.... Make sure you nearly center it as mine was not from factory and I now have a nice little gouge to peek at when I strip it...
Brent
As for the bad firing pin stop pin.... Make sure you nearly center it as mine was not from factory and I now have a nice little gouge to peek at when I strip it...
Brent