Page 1 of 1
MKII straight trigger mod.
Posted: Thu Jan 10, 2008 11:59 pm
by jjfunk
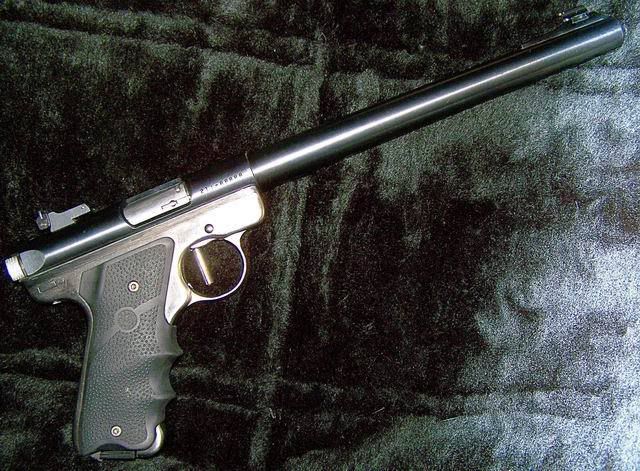
I modded up a used trigger that I had no use for to a straight style target trigger with bearings on the vert. to compensate for trigger pull or push. I am going to target test it this weekend and will post results and opinions if anyone is interested. Here's a pic of what it looks like right now.
JJ
Posted: Fri Jan 11, 2008 6:39 am
by Bullseye
Interesting looking trigger JJ. How does it feel?
R,
Bullseye
Great Minds
Posted: Fri Jan 11, 2008 8:06 am
by recumbent
JJ:
Great minds must think alike.
On Wed night I modified a factory trigger to the round straight type now I'm working on doing something similar to a Marvel trigger.
I took a little different approach on the factory trigger. I will be shooting them tomorrow. Will post photos and results too.
Yours looks really good.
Posted: Fri Jan 11, 2008 10:11 am
by Glenn
Keep us posted guys. I'm interested in hear about this.
Posted: Fri Jan 11, 2008 10:58 am
by jjfunk
It feels good actually. I like straight triggers on some of my BR rifles, and when I got this trigger that had been "modified" as an exchange on a drilled and tapped factory unit, I couldn't figure out what to do with it. So I used the factory unit, drilled and tapped it for pre-travel, cut it up, and then drilled/tapped for a pin. Over the pin I put some "micro bearings". In function testing even if I tried to "drag" or "push" my trigger finger, I still end up with a straight pull every time. If nothing else, it was some good quality "tinker" time. I also did the "finer sights" mod, stuffed it full of VQ parts and got a Ranch Products mag release put in. I'm still depating on whether or not to do the Wolff spring kit to it. I hope to get to shoot it this weekend for groups and to see if any of this tinkering will help to improve my previous five shot/four groups avg. best of .731" with this one. Wish me luck!
-Some photos of the trigger process:
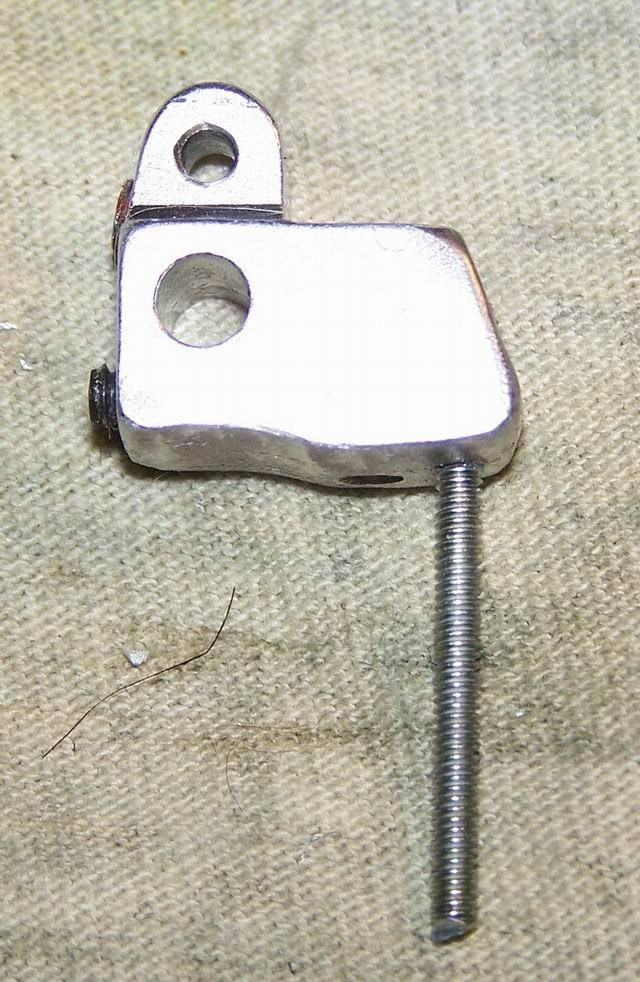
How I got the trigger-

The "halfway" point-
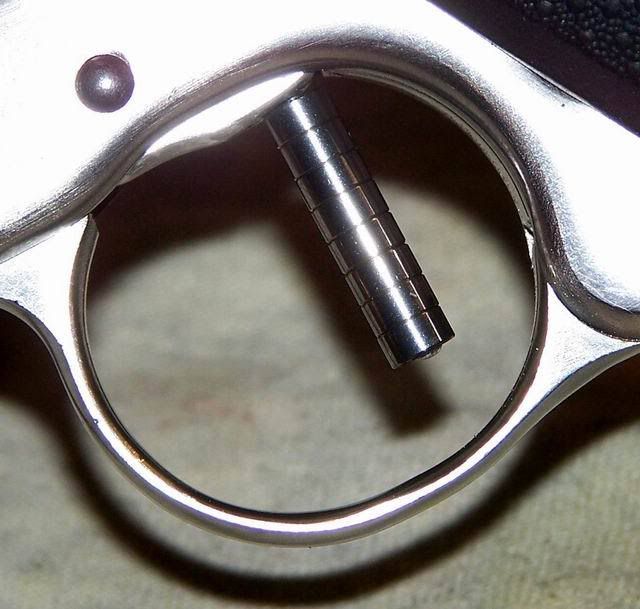
A close up of the finished product-
Posted: Fri Jan 11, 2008 7:55 pm
by Bullseye
Very nice! I noticed you installed an internal pretravel mod to the trigger too.
R,
Bullseye
Posted: Fri Jan 11, 2008 9:19 pm
by jjfunk
You betcha! I thought about doing the angled externally adjustable pre-travel mod, but after looking at it for a while, I figured that I didn't want to be able to see the adjustment screw. I don't mind doing them inside, and prefer to use #4-40 screws instead of the #6 that Ruger uses for the over-travel screw because with the #6 it is too easy to get into the disconnector reset plunger recess or into the main trigger pivot pin hole. I was a bit worried about whether I would have enough "meat" behind the plunger spring hole, but it turned out that there was plenty of space once I got the face squared to my pin angle. One thing that I may do differently if I try this again, when flattenning the bottom of the trigger block, I got into the trigger plunger hole about 1mm. It has plenty of shoulder inside to still support the spring though.
JJ
Posted: Fri Jan 11, 2008 9:23 pm
by jjfunk
Hey Recumbent,
On the Marvel trigger base, since it is pre drilled and tapped this is probably a little bit easier. Could you post a few pics of yours "in-build"?
Thanks,
JJ
Posted: Sat Jan 12, 2008 9:38 am
by recumbent
I thought it would be pretty easy since the trigger is held to the trigger body with a 6-32 screw. I tried it that way and the straight trigger was too far forward. I could not get my finger between the round trigger and the trigger guard.
So I had to make a plate to fasten to the body with the straight trigger to the rear. I had some aluminum plate one was too thin and the one I used is a little thicker than I like but it will do for now.
I drilled and tapped the plate 6-32 and used a 6-32 SHCS threaded thru an aluminum spacer. Then the SHCS head was too close to the rear of the trigger guard when the trigger was pulled so I ground it to get the clearance I liked.
Hopefully I have enough clearance, I'll find out this afternoon when I shoot it.


[/img]
Posted: Sat Jan 12, 2008 10:10 am
by jjfunk
I also had to slightly grind the rear of the trigger window for clearance. A fine rat-tail file just to slightly "curve" the rear edge for the top of the round pin. Talk about comparison. Kinda funny that two of us are doing the exact same mod at the same time.
JJ
Posted: Sat Jan 12, 2008 6:27 pm
by jjfunk
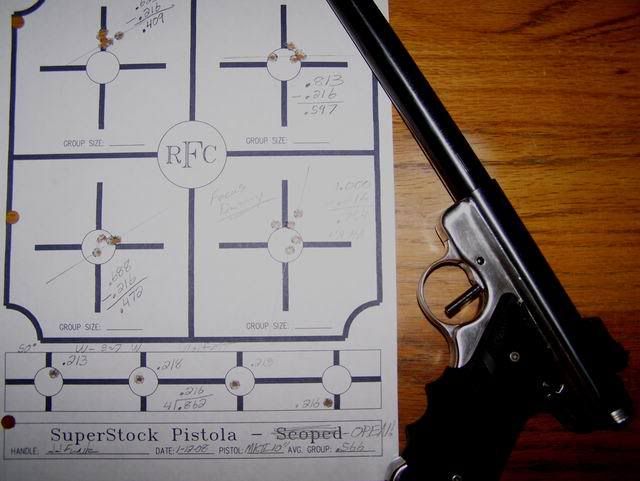
Range Report:
Love the trigger. Moves like glass, very smooth. Shoots good too.
Posted: Sun Jan 13, 2008 12:35 pm
by recumbent
I shot mine yesterday felt weird at first but once I got used to it I think I will like it.