While waiting, I decided to do the external adjustable trigger modification.
Just to be different, mine's a 5-40 thread .
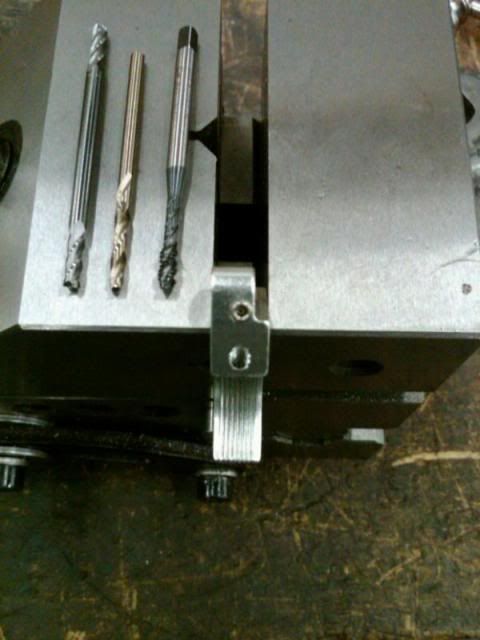
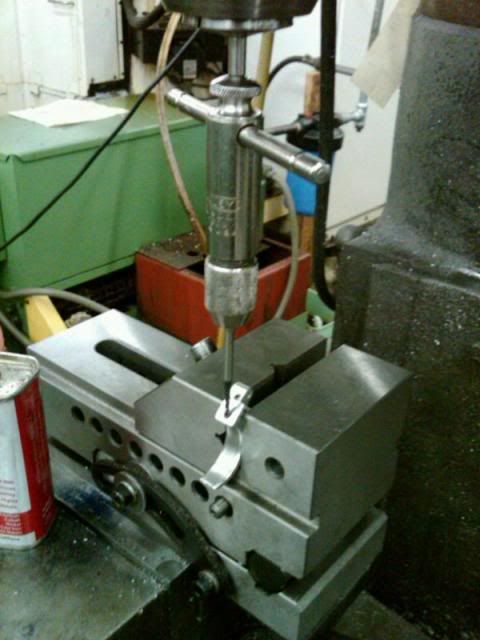
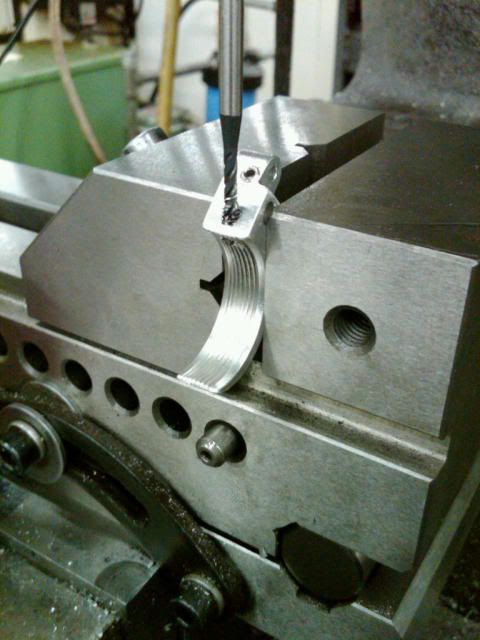
Just some photo's to show how I did it.
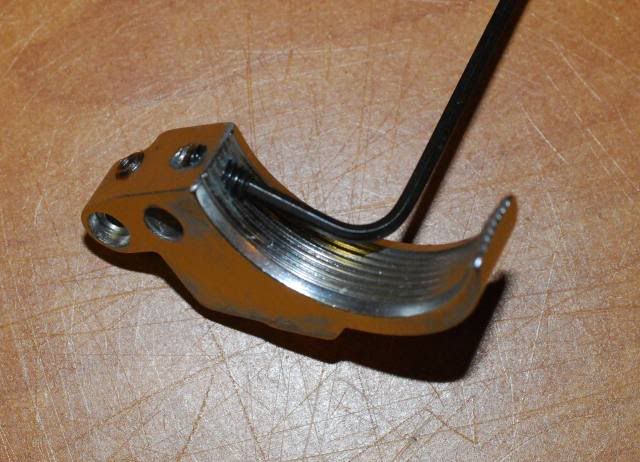
Blue loctite is definitely required for this one!!
update: it's installed and what a difference that made!!!!
BE's the best
My 2010 project-Ruger Mark III pistol
Moderators: Bullseye, Moderators
The only difference between the way you did that trigger and the way I do it is I start off with a centerpoint drill bit first to prevent the cutting bit from walking or breaking from strain.
If you want I can add that stock trigger picture into the sticky on externally modifying a trigger for Pretravel adjustment. The current photos are of the old style VQ target triggers.
R,
Bullseye
If you want I can add that stock trigger picture into the sticky on externally modifying a trigger for Pretravel adjustment. The current photos are of the old style VQ target triggers.
R,
Bullseye
Please do!! Now, if you can help me with finding that damn 10 ring....Bullseye wrote:The only difference between the way you did that trigger and the way I do it is I start off with a centerpoint drill bit first to prevent the cutting bit from walking or breaking from strain.
If you want I can add that stock trigger picture into the sticky on externally modifying a trigger for Pretravel adjustment. The current photos are of the old style VQ target triggers.
R,
Bullseye
Last time I checked it was surrounding the 'X' ring in the center of the target! Oh, you want me to help you find a way to hit that center? You've got to put in some practice time and hone those skills.perazzi wrote:
Please do!! Now, if you can help me with finding that damn 10 ring....
R,
Bullseye
I added that picture to the Sticky: http://www.guntalk-online.com/forum/vie ... hp?p=21#21
I copied it and placed it on my server, this way you don't have to worry about your photobucket account getting hit for bandwith.
R,
Bullseye
I copied it and placed it on my server, this way you don't have to worry about your photobucket account getting hit for bandwith.
R,
Bullseye
Practice? did you say practice?! *sigh* there's just never a short way around it is there.....Bullseye wrote:Last time I checked it was surrounding the 'X' ring in the center of the target! Oh, you want me to help you find a way to hit that center? You've got to put in some practice time and hone those skills.perazzi wrote:
Please do!! Now, if you can help me with finding that damn 10 ring....
R,
Bullseye
Ok. Every project has to end sometime.
I took Blue's suggestion about the Clark bushing style. I made another custom fitted anti-mag bushing for the hammer. Press fit into the hammer. Custom made a hammer bushing pin and fitted it. That really, really reduced the lateral play in the factory trigger. Still had a hesitation spot on the trigger pull.. decided it was roughness on the backside of the sear where the disconnector rides. Polished that up and pretty well took care of the problem.
Now, with the polished up VQ sear, I have about a 1#14oz pull. It's loong, but, no jerkiness or hesitation. I guess that might be the roll trigger some are talking about.
Well, the proof will be in the pudding. Stopping by the local range tomorrow, shoot a few 50' slowfires and see what I get.
Damn near wore the gun out disassembling it about 50 times!! I've got pretty good at taking out and putting in!!
- blue68f100
- Master contributor
- Posts: 1997
- Joined: Mon May 25, 2009 10:31 pm
- Location: Piney Woods of East Texas
I wonder if he had to take it apart to adj the factory trigger.Damn near wore the gun out disassembling it about 50 times!! I've got pretty good at taking out and putting in!!
The long travel is common on the MK's. You can shorten that some but you may need to make another bushing. Just make the larger dia that the sears ride on larger, but you should not go less the 0.012-0.015" of engagement. Takes some measurements you may be near 0.020" or longer depending on tollerance. Or back cut the sear as bullseye suggested will help, but test with limited rounds in the mag.
David
SS MKIII 6 7/8" Fluted Hunter. Mueller Quick Shot, Bushnell 2x Scope, Hogue Rubber Grips
Custom Built 1911
SS MKIII 6 7/8" Fluted Hunter. Mueller Quick Shot, Bushnell 2x Scope, Hogue Rubber Grips
Custom Built 1911
I've printed your quote out, and pasted it to my shooting box. Should scare the bejesus out of those GlockMeisters shooting next to me....Bullseye wrote:Just load two rounds in the mag at a time until you're absolutely sure that reworked sear won't double.
R,
Bullseye
(actually. Test fired it last night, outside.. Living rural is wonderful, isn't it.. lol)
The sear engagement is right at .021 right now. Off to the range.